In the fast-paced world of real estate, first impressions can make or break a deal. Prospective buyers and renters often form their initial opinions based on the visual appeal of property listings. In this digital age, where property hunting begins online, the quality of your property images can be the key to attracting potential clients. That’s where the art of real estate photo editing comes into play.
Why Real Estate Photo Editing Matters
Let’s start by addressing the fundamental question: Why does real estate photo editing matter? In the world of online property listings, your photos are your storefront. They are the first point of contact potential buyers or renters have with a property. As such, these images need to be nothing short of spectacular.
Real estate photo editing goes beyond simply retouching images; it’s about transforming them into visually compelling masterpieces that grab viewers’ attention and evoke a desire to explore further. With edited photos, you can:
- Highlight Key Features: Editing allows you to accentuate the property’s most attractive features, whether it’s the gleaming hardwood floors, the spacious kitchen, or the stunning view from the balcony.
- Ensure Consistency: Inconsistent lighting or colors in photos can be distracting. Photo editing can help maintain a consistent look and feel across all your listings.
- Create a Warm and Inviting Atmosphere: A well-edited image can convey a sense of warmth and comfort, making potential buyers or renters feel welcome even before they set foot in the property.
- Stand Out from the Competition: In a crowded real estate market, high-quality images set your listings apart and can drive more inquiries.
Common Photo Editing Techniques
Now that we’ve established the importance of real estate photo editing, let’s delve into some of the common techniques used in this process:
- Color Correction: Adjusting colors to ensure they are true to life. This includes correcting white balance, removing color casts, and enhancing vibrancy.
- Brightness Adjustment: Balancing the exposure to ensure that both well-lit and shadowed areas are properly exposed.
- Retouching: Removing minor imperfections, blemishes, or distractions to create flawless images.
- Image Stitching: Combining multiple photos to create stunning panoramas that showcase the property’s spaciousness.
- Sky Replacement: Enhancing outdoor shots by replacing dull skies with vibrant ones, especially useful for properties with outdoor spaces.
- Virtual Staging: Out of photo editing technique but virtual staging also is a good service that can add virtual furniture and decor to vacant rooms, helping potential buyers visualize the space’s potential.
Before and After Examples
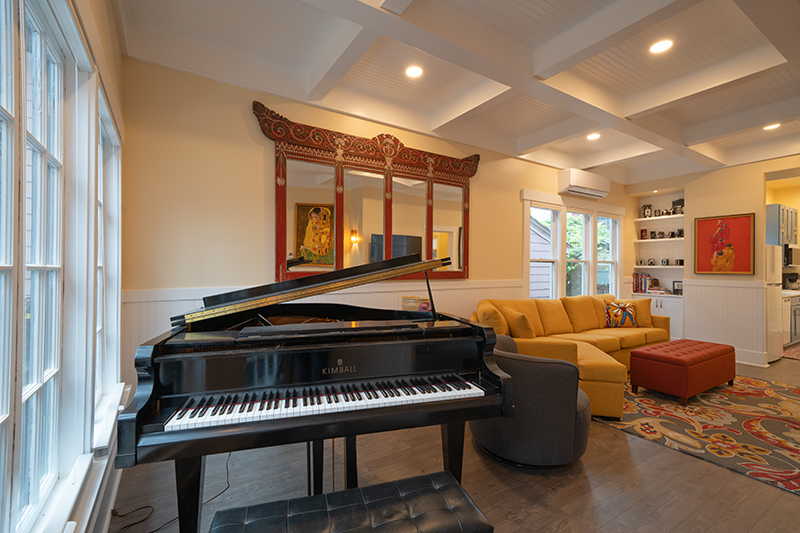
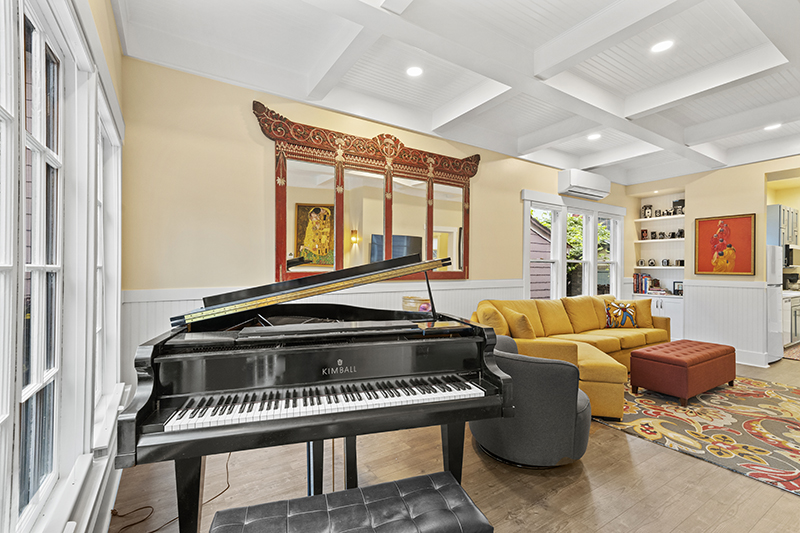
Seeing is believing. Let’s take a look at some before-and-after examples of real estate photo editing. These transformations illustrate how subtle adjustments can make a significant difference in the presentation of a property:


As you can see, real estate photo editing can turn an ordinary image into a captivating one, making the property more appealing to potential buyers or renters.
DIY vs. Professional Editing
Now that you understand the value of real estate photo editing, the next decision is whether to handle it in-house or seek the expertise of professional editors. Each approach has its pros and cons.
DIY Editing: If you have the time and some basic photo editing skills, you can certainly take a DIY approach. Many photo editing software tools are user-friendly and offer tutorials to help you get started.
Professional Editing: On the other hand, enlisting the services of professional real estate photo editors has distinct advantages. These experts bring years of experience, an eye for detail, and a deep understanding of the real estate market. They can efficiently transform your images, ensuring they are nothing short of stunning.
Tips for DIY Editing
If you decide to venture into DIY real estate photo editing, here are some tips to help you get started
- Invest in quality photo editing software: Adobe Lightroom and Photoshop are popular choices.
- Learn the basics: Familiarize yourself with essential editing tools like exposure adjustment, cropping, and color correction.
- Take your time: Editing is a skill that improves with practice. Don’t rush the process; carefully review and refine your work.
- Seek feedback: Share your edited images with colleagues or friends for constructive feedback.
Conclusion
In conclusion, real estate photo editing is a powerful tool that can elevate your property listings to new heights. It’s an investment in the visual representation of your properties and, ultimately, your success in the real estate market. Whether you choose to master the art of DIY editing or enlist professional help, the key is to prioritize image quality. In the competitive real estate landscape, stunning photos can make all the difference.
Stay tuned for more insights into the world of real estate image editing, where we’ll delve deeper into specific editing techniques and explore how to choose the right photo editor for your real estate business.


